Friday, July 22, 2016

A New Home For Rhino

He's up!! My little Rhino has been rehoused to my living room wall and I think he is quite happy there.

Last time I posted on Rhino he had just been pieced together and because I chose a sturdy paper to make him he didn't sit quite so neatly together so he needed a little make-over.


I had a lot of packing paper lying around. You know the kind you get in a homeware store that they use to wrap up your dishes so they don't break on the way home? I usually keep some to have just in case and it was perfect for papier maché.


To start with I taped up all of Rhinos gaps with masking tape.


Next step was to cut strips of the paper, inch thick strips work great for all of the angles.


The easiest papier mache adhesive solution is 1 part PVA glue to 2 parts water. It looks hideous but it mixes well and forms a great finish.


So mix up your paste and get painting on the paper. I think I coated Rhino 3 times, adding a few more layers to the particularly gappy bits.

The paper I used was unbleached so he looks very natural. 

Should I paint him?? Im not sure. Im afraid theres no going back if I do. I like him au natural. The light colour really shows off his lovely angles.


If you want to make a Rhino like mine here is the link again to my previous blog post http://twillandtwee.blogspot.ie/2016/07/a-rhino.html

Nic xx

Tuesday, July 19, 2016

A Rhino

A little paper craft project I think!

So in the desire for a mini gallery wall in my living room I wanted something a little 3D. Everyone seems to have stags and moose heads with big impressive horns that have come from some vintage shop costing an arm and a leg or from your everyday homewares store for €5 but plastic and cheap looking.

Something a little different perhaps?

Enter the Rhino Project!

I bought my Rhino instructions from Etsy. Its a digital download so the designer sends you a PDF and its up to you from there.
Here is the Rhino I chose https://www.etsy.com/transaction/1144810552

There are some other beautiful animals to choose from the sellers shop.

Other websites offer kits, ideal for someone who is new to paper craft or an ideal gift. 

Most of these printables are for A3 sized blueprints. I didn't want such a huge rhino so I went for A4 which still turned out pretty big. Plus I didn't have to seek out an A3 printer.

So!! Time to get started. Print out the instructions and READ THEM!!! Do not skip a word you may regret it later.

Print out the blueprints and cut them out.


I of course had to make it more difficult for myself. I wasn't happy with xerox paper its too thin and had a tonne of card left over from our wedding so I glued the blueprints onto the card, it was too thick for my printer, and then cut it all out again.......great fun!!


Time to start creasing and folding. There is a key in the instructions that tells you which lines need folding and which need creasing in the opposite direction. A skinny ruler and a good edge on a desk or a table are really helpful here.


When assembling I had a little trouble with glue as it wasn't holding the heavy pieces of card together so I had a mixture of glue, double sided tape and tiny clothes pegs as holders. Paper clips would work great too!! 

Its a numbers game, you match the numbers together like a big jigsaw puzzle.


It gets a little fiddly towards the end but hang in there!!! It will look amazing when it is done.


And here he is!! My little rhino friend. Look at the beautiful angles!!

Im not quite done yet. I would like a much smoother finish so Im going cover him up somehow whether it be paint or papier maché. I will do a follow up post next week.

I just love him he's so unusual!! 

Now to clean up........


Tuesday, July 12, 2016

Gooseberry and Apple Crumble

Gooseberry season has finally arrived. Time to make use of those delicious berries. 

Its the first batch so we can't resist a yummy crumble. Its a staple for us.

The recipe couldn't be simpler. This makes enough for 4 small portions or 3 large, just double the mix if you have a crowd for dinner.

Ingredients:

150g fresh gooseberries (topped and tailed if required)
1 cooking apple peeled and diced into 1 inch cubes
120g plain flour
60g butter chilled
60g soft brown sugar
2 tbsp caster sugar (less if the gooseberries are not too sour)


Method

1. Preheat the oven to 180C

2. Scatter the apples and gooseberries over the bottom of an oven proof dish.


3. Sprinkle the caster sugar evenly over the fruit and set aside.


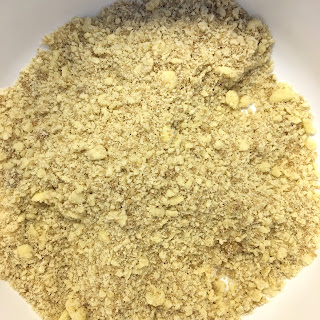
4. To make the crumble topping put the flour into a separate bowl. Add in the butter and using your hands pinch the butter into the flour to make coarse bread crumbs. A handy tip; if your butter gets really hard in the fridge, grate it in!! 
Add the brown sugar and this is what you should have.


5. Sprinkle the crumble topping evenly over your fruit.


6. Bake in the oven for 30-40 mins until the fruit is bubbling and the top is golden.


Done!! How easy is that? Allow to cool for about 10 minutes as the fruit will be like lava hiding underneath the crumble.

Then EAT!


Mine is with ice-cream, his with Greek yogurt....he's so good! Don't forget the tea.


Enjoy everyone 

Nic x


Monday, July 4, 2016

Elliot's Ripple Baby Blanket

For my first pregnancy I was determined to learn a new craft because I wanted to make something special for the baby that he could have forever. I could knit but I found it frustrating so I researched classes in Dublin city and a crochet class popped up. Perfect!!

Remarkably only 2 of us signed up so we had almost one to one lessons it was amazing. We had a ball gossiping, drinking endless cups of tea and crocheting. 

I came away with all of the basic stitches and a few nifty tricks so I started my baby project.

A blanket seemed the best first project as it was repetitive and easy to manage.

For the yarn I chose Stylecraft Special DK because of the amazing range of colours for its very reasonable price...and because its acrylic. Im very allergic to wool sadly cannot use it. 
Not to worry acrylic is an excellent choice, it washes and dries like a dream and doesn't ball or fray.

Not knowing the sex of the baby I thought every colour will do so I got all of these!!


Here are a list of the colours if you wish to do the same scheme.
  • 1259 Bright green
  • 1061 Plum
  • 1026 Apricot
  • 1020 Lemon
  • 1241 Fondant
  • 1245 Lipstick
  • 1117 Royal
  • 1132 Shrimp
  • 1063 Graphite
  • 1034 Sherbet
  • 1116 Green
  • 1256 Jaffa
  • 1390 Clematis
  • 1001 White


The pattern is a beautiful easy pattern by the blogger Attic24. If you can do the basic crochet stitches you can do this pattern, just follow the instructions carefully. I find youtube tutorials great for learning new tricks. You will find how to do the increase and decrease stitches no problem. 

See the pattern here...


So pop the kettle on, put the feet up, turn on a good movie and get crocheting!! 


Nic xx